Chocolate Cream Pie Cups
Highlighted under: Oven-Fresh Treats
I absolutely love making these Chocolate Cream Pie Cups when I'm in the mood for a rich, decadent dessert. The combination of creamy chocolate filling and a crunchy crust is incredibly satisfying, not to mention how easy they are to prepare. Each little cup is a perfect indulgence for any occasion, and they never fail to impress my friends and family. Plus, the best part is that they can be made ahead of time, making them perfect for gatherings or simply a cozy night in.
When I first tried my hand at making Chocolate Cream Pie Cups, I was surprised at how simple it could be to create a dessert that tasted so rich and gourmet. I decided to use a combination of dark and milk chocolate to achieve a well-balanced flavor profile. By whipping the cream to soft peaks before folding it into the chocolate, I found it created a light and airy texture that just melts in your mouth.
One of my favorite tips is to let the crust chill briefly in the freezer before filling it with the chocolate mixture. This helps to keep the crust nice and crisp, providing a delightful contrast to the creamy filling. These little cups have become my go-to dessert when I want to impress, and they never disappoint!
Why You'll Love This Recipe
- Rich chocolate flavor paired with fresh orange zest
- Creamy texture that melts in your mouth
- Perfect for celebrations or as a sweet indulgence
Mastering the Crust
The crust is a crucial element of your Chocolate Cream Pie Cups, as it provides a delightful crunch that balances the creamy filling. I recommend using high-quality chocolate cookies for the best flavor, as they will enhance the overall taste of the dessert. When mixing the crushed cookies with melted butter, ensure that every crumb is coated evenly. This will help create a sturdy crust that holds its shape when served.
Pressing the mixture firmly into the cups or muffin tins is essential. Aim for an even layer across the bottom and sides to ensure that the crust doesn’t crumble when you fill it. If you find the crust is too crumbly, consider adding a bit more melted butter until you achieve a consistency that can hold its shape.
Creating Velvety Chocolate Filling
For the chocolate filling, heating the heavy cream gently is key. Make sure to keep an eye on it as it heats; you want it to reach just a simmer rather than boiling. This technique helps the chocolate melt smoothly, preventing any chance of seizing. Use high-quality dark and milk chocolates for the best flavor; I love using a 70% cocoa dark chocolate for its rich bitterness, which pairs beautifully with the sweetness of the milk chocolate.
It's important to allow the chocolate mixture to cool slightly before whipping. If you skip this step, the whipped cream might deflate when folded in. The filling should be thickened enough to hold its shape when spooned into the crust but still fluid enough to combine with the whipped cream. A gentle fold will preserve the airy texture, ensuring each bite is light and luscious.
Tips for Garnishing and Serving
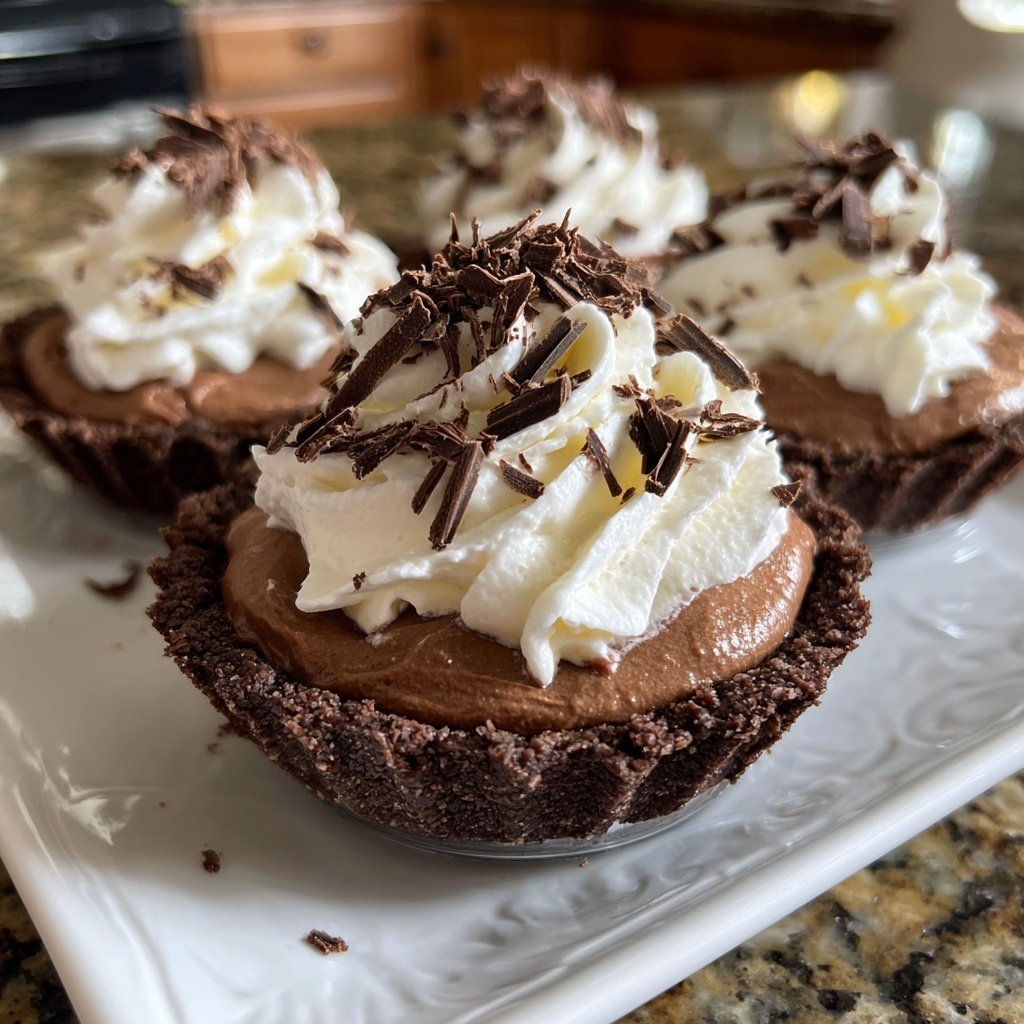
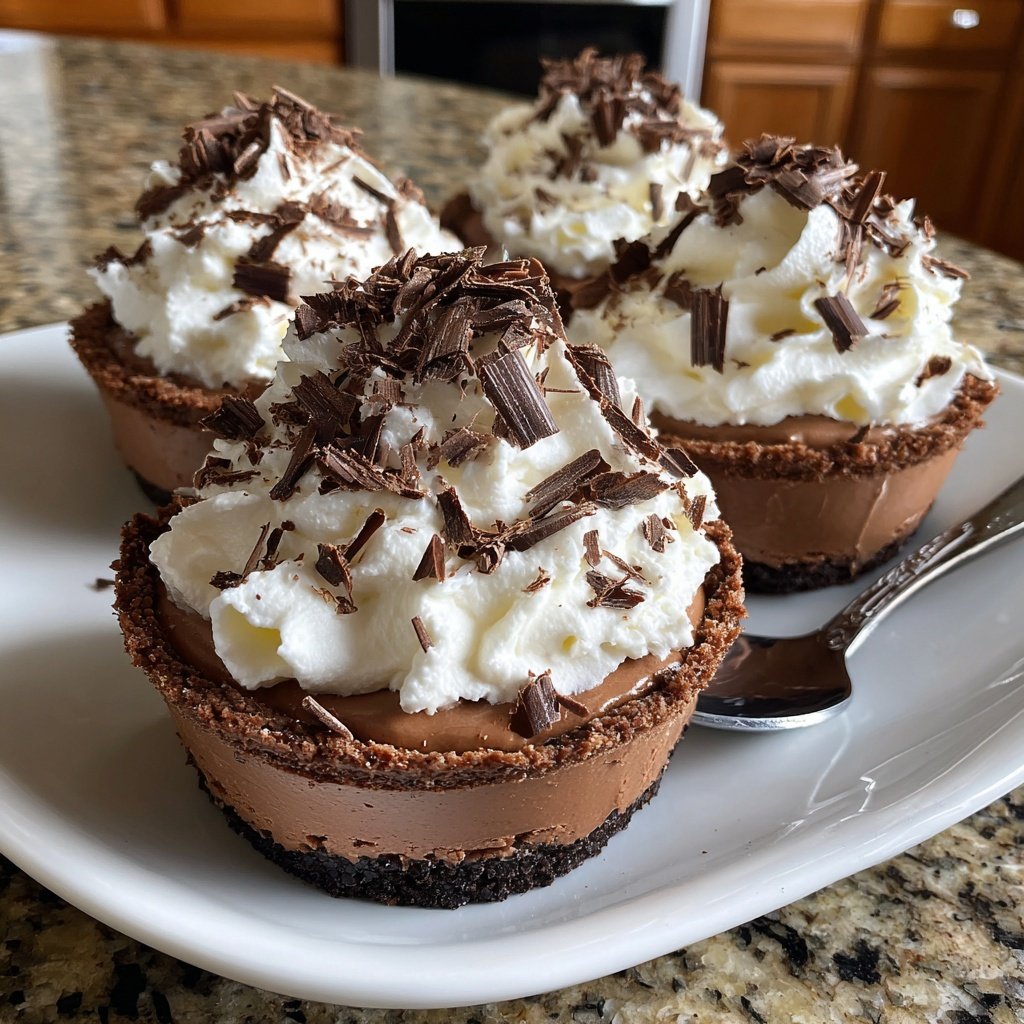
Garnishing your Chocolate Cream Pie Cups not only enhances their visual appeal but adds extra flavor dimensions as well. Fresh berries, like raspberries or strawberries, provide a tart contrast to the rich filling, while chocolate shavings add a touch of elegance. When adding toppings, do so just before serving to maintain the texture and avoid sogginess in the crust.
If you’re making these cups ahead of time, consider using an airtight container for storage. They can be kept in the refrigerator for up to three days. However, make sure to add the whipped cream just before serving to retain its fluffy texture. This dessert can also be frozen without toppings; simply wrap them tightly and store for up to a month. When ready to enjoy, thaw in the refrigerator overnight and add your garnishes.
Ingredients
For the Crust
- 1 cup crushed chocolate cookies
- 4 tablespoons unsalted butter, melted
For the Filling
- 1 cup heavy cream
- 1/2 cup dark chocolate, chopped
- 1/2 cup milk chocolate, chopped
- 1 teaspoon vanilla extract
- 1/4 cup powdered sugar
For Topping
- Whipped cream
- Chocolate shavings
- Fresh berries (optional)
Make sure to use quality chocolate for the best flavor!
Instructions
Prepare the Crust
In a bowl, combine the crushed chocolate cookies and melted butter. Mix until the crumbs are evenly coated. Press the mixture into the bottom and sides of small cups or muffin tins. Place in the refrigerator for about 10 minutes to set.
Make the Chocolate Filling
In a saucepan, heat the heavy cream over medium heat until just simmering. Remove from heat and add the chopped dark and milk chocolate. Stir until completely melted and smooth. Mix in the vanilla extract and powdered sugar until well combined.
Combine and Chill
Allow the chocolate mixture to cool slightly, then whip until slightly thickened. Fold the whipped cream gently into the chocolate mixture. Spoon the filling into the chilled crusts and smooth the tops.
Garnish and Serve
Chill the chocolate pie cups in the refrigerator for at least 2 hours before serving. Top with whipped cream, chocolate shavings, and fresh berries, if desired.
Enjoy these delightful cups as a perfect dessert for any occasion!
Pro Tips
- For an added twist, consider incorporating a splash of orange liqueur into the chocolate mixture for a citrus kick.
Ingredient Substitutions
If you’re looking to lighten the dessert, try using reduced-fat whipped cream or a dairy-free alternative such as coconut whipped cream. The flavors will change slightly, but the overall integrity of the dessert remains intact. Additionally, if you’re allergic to chocolate cookies, consider making a crust using crushed graham crackers or even vanilla wafers, complemented with cocoa powder for that chocolate essence.
For those wanting to avoid refined sugar, you can substitute the powdered sugar with a sugar alternative like erythritol or a natural sweetener like maple syrup, which will impart a subtle flavor twist. Just keep in mind that moisture content may change; adjust the filling ingredients accordingly to maintain the desired consistency.
Scaling the Recipe
If you need to scale this recipe for a larger gathering, simply double or triple the amounts in the filling and crust sections. Remember to use the same ratios; this recipe can easily be adapted for a batch in a larger pie dish instead of individual cups, which can be a stylish option for parties. Just make sure to adjust the chilling time, as a larger pie may require longer to set.
When scaling, keep in mind that the chilling times may vary; always check for a firm consistency before serving. For larger quantities, it can be helpful to check the pie at intervals to ensure it doesn't over-set, which might lead to a less creamy texture. My best tip is to keep the filling slightly on the softer side if you're unsure, as it will firm up more once chilled.
Questions About Recipes
→ Can I make these ahead of time?
Yes, you can prepare the cups a day in advance and keep them covered in the refrigerator until ready to serve.
→ What type of chocolate should I use?
I recommend using good quality dark and milk chocolate for the best flavor. You can also experiment with different types of chocolate.
→ Can I use a different crust?
Absolutely! Feel free to use graham cracker crusts or even a gluten-free option if needed.
→ How long do they last in the fridge?
They can be stored in the refrigerator for up to 3 days, but they are best enjoyed fresh.
Chocolate Cream Pie Cups
Created by: Madison Cole
Recipe Type: Oven-Fresh Treats
Skill Level: Intermediate
Final Quantity: 6 servings
What You'll Need
For the Crust
- 1 cup crushed chocolate cookies
- 4 tablespoons unsalted butter, melted
For the Filling
- 1 cup heavy cream
- 1/2 cup dark chocolate, chopped
- 1/2 cup milk chocolate, chopped
- 1 teaspoon vanilla extract
- 1/4 cup powdered sugar
For Topping
- Whipped cream
- Chocolate shavings
- Fresh berries (optional)
How-To Steps
In a bowl, combine the crushed chocolate cookies and melted butter. Mix until the crumbs are evenly coated. Press the mixture into the bottom and sides of small cups or muffin tins. Place in the refrigerator for about 10 minutes to set.
In a saucepan, heat the heavy cream over medium heat until just simmering. Remove from heat and add the chopped dark and milk chocolate. Stir until completely melted and smooth. Mix in the vanilla extract and powdered sugar until well combined.
Allow the chocolate mixture to cool slightly, then whip until slightly thickened. Fold the whipped cream gently into the chocolate mixture. Spoon the filling into the chilled crusts and smooth the tops.
Chill the chocolate pie cups in the refrigerator for at least 2 hours before serving. Top with whipped cream, chocolate shavings, and fresh berries, if desired.
Extra Tips
- For an added twist, consider incorporating a splash of orange liqueur into the chocolate mixture for a citrus kick.
Nutritional Breakdown (Per Serving)
- Calories: 380 kcal
- Total Fat: 26g
- Saturated Fat: 15g
- Cholesterol: 195mg
- Sodium: 85mg
- Total Carbohydrates: 32g
- Dietary Fiber: 3g
- Sugars: 24g
- Protein: 6g